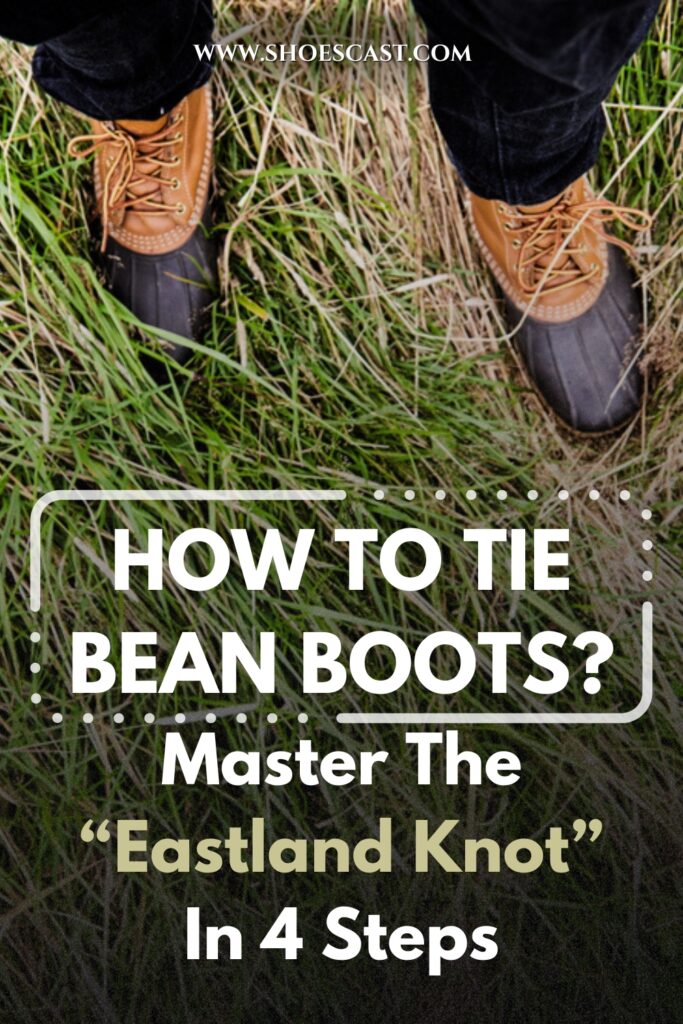
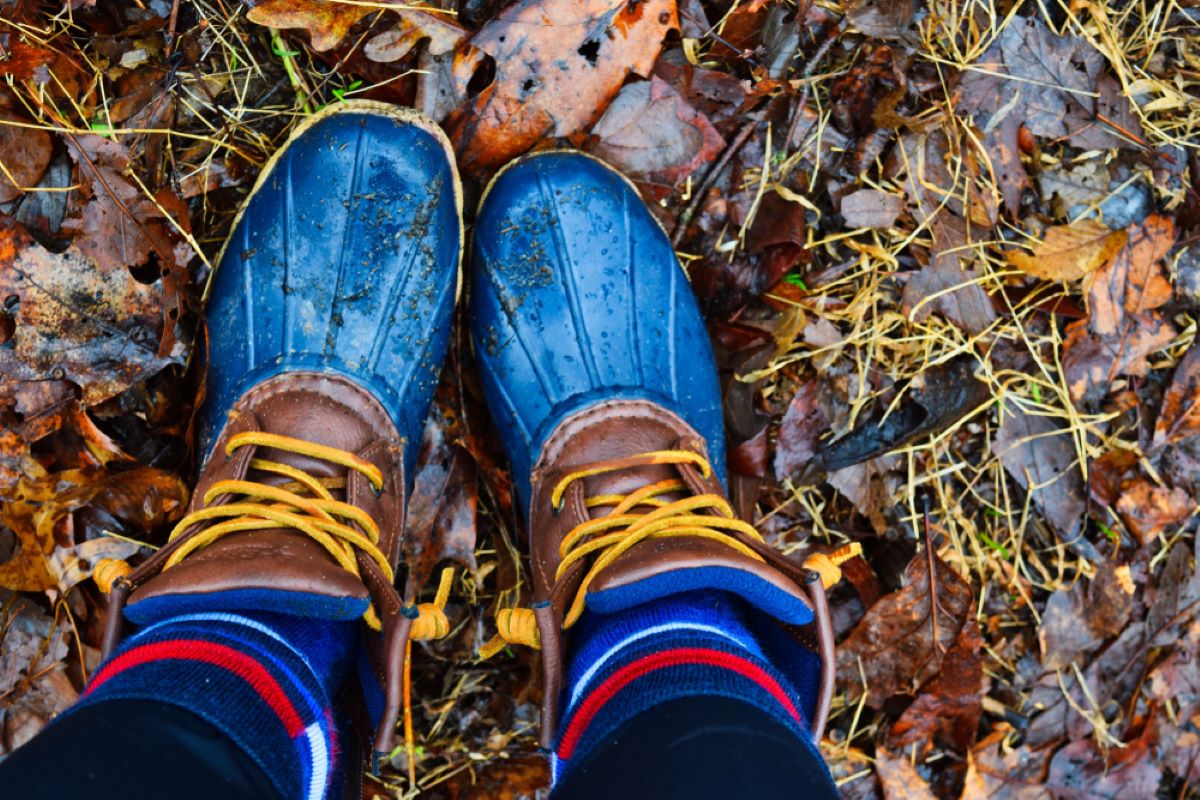
Aren’t Bean Boots just adorable? Often referred to as “the second most important shoes” these boots are both very trendy and very comfy. However, we cannot help but ask ourselves: how to tie Bean Boots to make them look even more trendy?
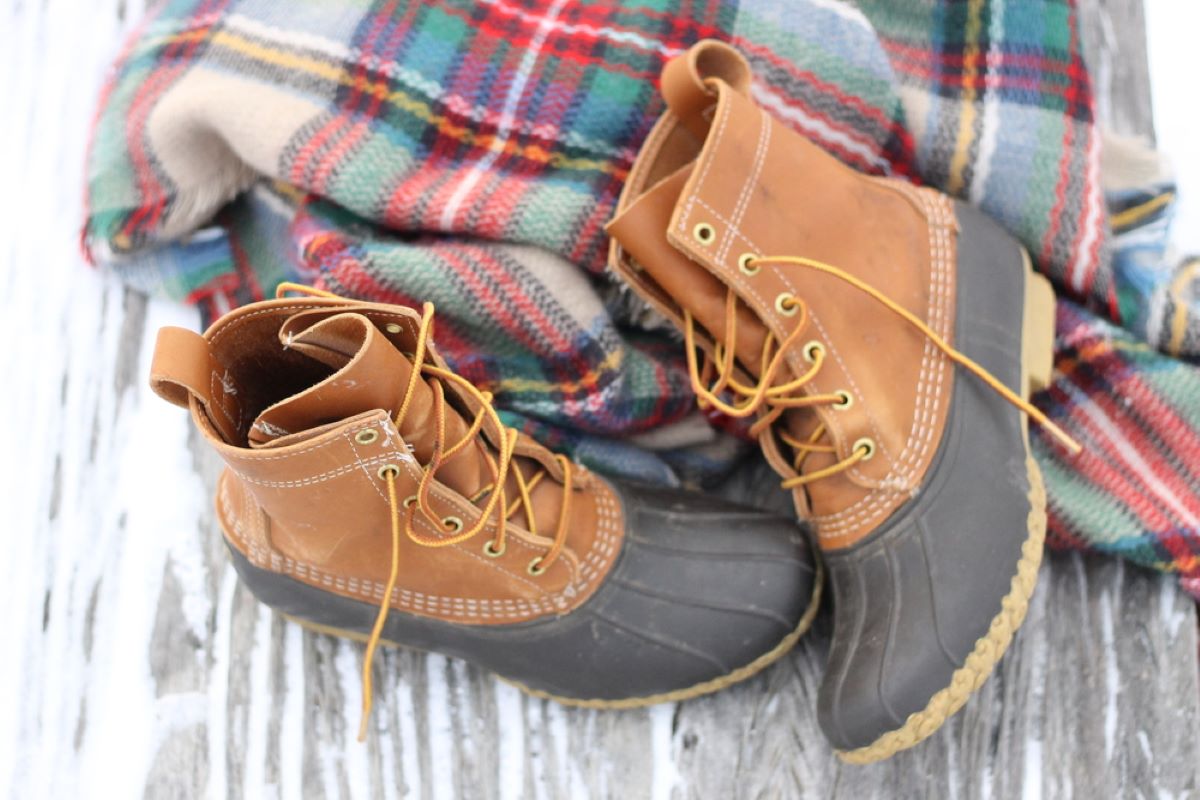
Initially named Maine Hunting Shoes in 1911, these boots were manufactured to be resilient. Their creator, L.L. Bean, on one of his regular outdoor activities, noticed that his feet were cold and wet because the boots he was wearing at the time were obviously not functioning properly.
He decided to take matters into his own hands and design boots that would combine the rubber soles of standard rain boots with full-grain leather uppers in the most remarkable fashion, merging comfort with utility.
All those years ago he created boots that were destined for the roads less traveled, the quality of which is still loved and appreciated to this day.
When I first laid my eyes on these boots, I felt immediately drawn to them. My friend had them at the time, saying how she had never worn anything better. She claimed those boots were the best investment she ever made for her feet.
Naturally, I had to buy them for myself to see if her claims hold any water. And I was more than happy to find out they indeed do! They were (and still are) some of the best boots I ever splurged on.
Once they became an integral part of my wardrobe, I went on a quest of finding out ways of styling them and incorporating them into my everyday outfits. You cannot blame me – I simply couldn’t save them only for hikes. I had to wear them on a daily basis.
Styling them wasn’t complicated at all since they are truly the perfect pair of boots that can go with pretty much anything. But, I also wanted to add some spice to my outfits.
And that’s when I found out about the “Eastland knot.” If you want to know more about them and learn how to tie Bean Boots, then keep on reading.
How should you lace Bean Boots?
Before we start explaining how to tie Bean Boots, we first have to say how these boots should be laced.
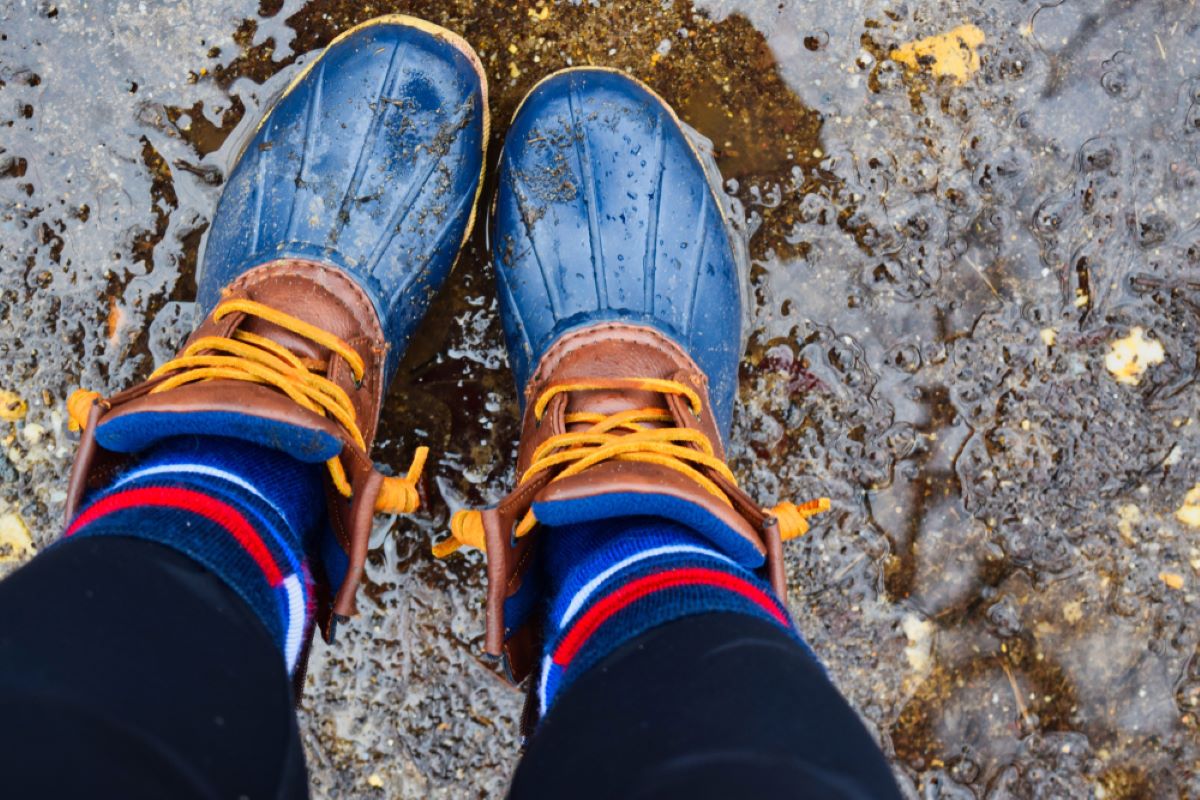
There is a wide range of different lacing designs, like bar laces, angle bar laces, braided bar laces, checkerboard laces, loop laces, and others alike. But, for these boots, you will need the good-old classic over-under lace design.
Just in case you are not sure how to achieve this lace design, here is a simple, step-by-step guide.
1. Starting at the bottom of your boots, pull the laces through the inside of the eyelets
Take both ends of your lace and thread both through the opposite eyelet. So, the left end will go through the right eyelet, and vice versa.
The ends of the shoelace should both go up through the inside of the eyelets and not down through the outside of it.
Once both ends are pulled through, make sure you have the same length of lace on both sides of the boot. If one is longer than the other, make adjustments until they are all even.
2. Pull the left lace through the right eyelet
When lacing your boots using this design, the left lace will always go through the right eyelet. And just like in the beginning, it should always go up through the inside of the eyelet.
3. Pull the right lace through the left eyelet
Do the same thing with the other side. Always pull the right lace through the left eyelet, going up through the inside of the eyelet.
Each time you pull both sides of the shoelace through, make sure to tighten them just enough, so they are not too loose. But also, do not make them too tight.
4. Continue crossing the laces until you reach the top of your boots
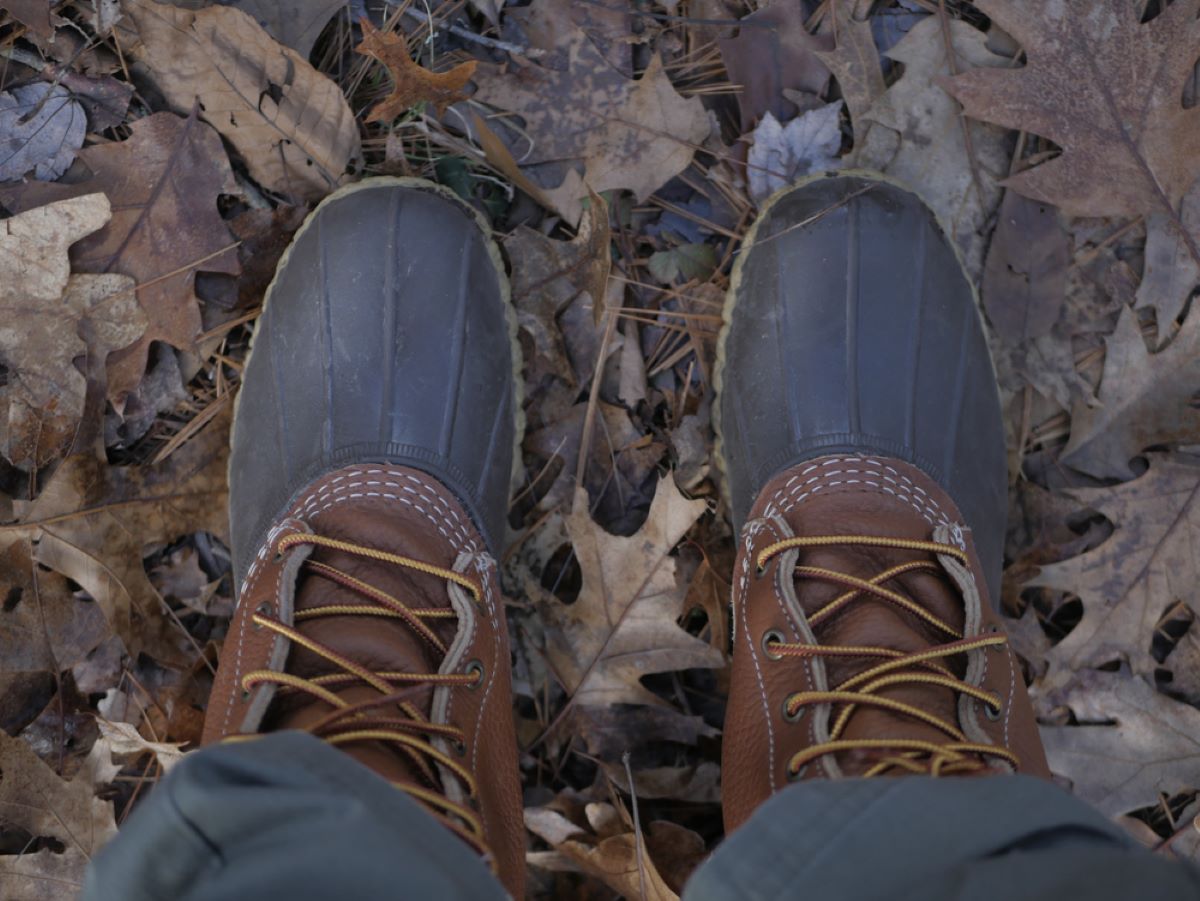
By pulling the left side of the shoelace through the right eyelet, and vice versa, you will create the crossing pattern. Continue doing so until you reach the top of your boots.
Always make sure you have the same length of lace on each side as it is much easier to fix it along the way, and not when you are finished with lacing your boots.
If you want a looser fit, you can stop crossing your shoelace when you reach the second-to-last eyelet on the top. Otherwise, if you want your boots to fit more firmly, lace them all the way through.
And there you go! Now your Bean Boots are ready to be tied.
How to tie Bean Boots?
Bean Boots, otherwise known as “duck boots,” are one of the best rain boots on the market. They can be tied however your heart desires, but the knot that is usually associated with them is the “Eastland knot.”
The “Eastland knot” is very easy to make. Even though it looks complicated and intimidating, it is actually very simple. Trust me! If I, a genuinely clumsy person, have managed to learn how to tie this knot, you will have no problem learning it, too!
All it will take is a little bit of effort, some goodwill, and concentration, and around a minute of your time for each shoelace. So, 2 minutes of your life in total. Pretty awesome if you ask me!
And the best thing is, this type of knot can be used with any kind of footwear, not just with Bean Boots. So, get your favorite pair of boots out, and let’s try together to tie the Eastland knot. I guarantee you will have a lot of fun doing it, and you will never want to tie your laces differently ever again.
1. Make a small loop with one of the laces
The first thing you will want to do is to take the lace on one side and fold it back toward the eyelet about just over an inch (somewhere between an inch and an inch and a half). By doing so, you will create that little loop that is an integral part of this knot.
Creating this loop is perhaps the trickiest thing to do. So, don’t be discouraged if you do not succeed on your first attempt. It will probably take you a couple of tries before you master the art of the loop.
Make sure that the loop you make is not too small, otherwise, you will not be able to wrap the shoelace around it; and not too big either since the knot would not be tight enough in that case.
2. Tightly wrap the lace around the loop
When your fingers grow accustomed to making the perfect loop, the next step is to start wrapping the lace around it.
Pinch the loop with your thumb and the index finger of your non-dominant hand to hold it in place and make it firm and secure, and then start to coil the lace around it 4-7 times. Make your way from the tail to the top of the loop, wrapping the lace tightly around it.
It might be a bit awkward at the beginning to get it going. But once you try it a couple of times and get used to it, it will become the easiest thing in the world to do.
3. Stick the end of the lace through the loop
Once you reach the top of the loop and are left with around a quarter of an inch of the shoelace, stop with the wrapping. That part of the lace that’s left is usually a bit firmer and stiffer or even has a plasticky bit at the end of it, called an aglet.
Before you stop, make sure that there is a small gap peaking through that wrapped part you have just made. If there is no gap, that means that your loop was too small, to begin with, and that you now have to start all over.
If there is a small gap, in order to “tie” the loop, stick the ending of the shoelace (or the aglet) through the top of it, pulling it tightly over and under. Once pulled, your Eastland knot is finished!
4. If necessary, adjust the created knot
If you wish to adjust your knot and make it either tighter or looser, you do not have to wrap everything off and start from the beginning.
All you have to do to tighten the knot is to push the wrapped lace with your fingers toward the end of the shoelace until the knot is fully compressed. To loosen the knot, pull the wrapped lace away from the end loop, toward the eyelet of the boot.
This is a good hack to remember since it can make putting your boots on ten times easier. All you have to do is loosen the knot when you are about to put your boots on and tighten it once it is on your leg. And voilà – you have the coolest knot on the block!
Now, just repeat the same process on the other side and the other boot, and there you go – all done! Your Bean Boots are ready for a walk.